Wemos/Lolin D1 RFM SHIELD
Publish date : 12-04-2021
Last edited: 12-04-2021
Created by:. PHB
Description:
Configure and connect the gateway to TheThingsNetwork Stack V2 and V3
Parts used in this tutorial
In this example we are going to configure this board to use it as a SingleChannel Gateway.
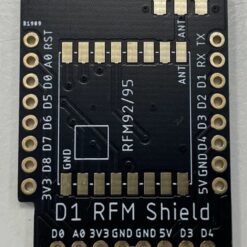
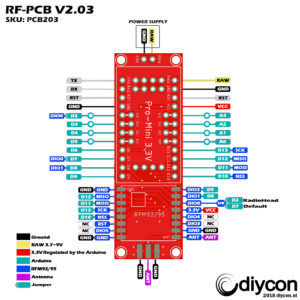
Place the RFM module on the board and solder it carefully
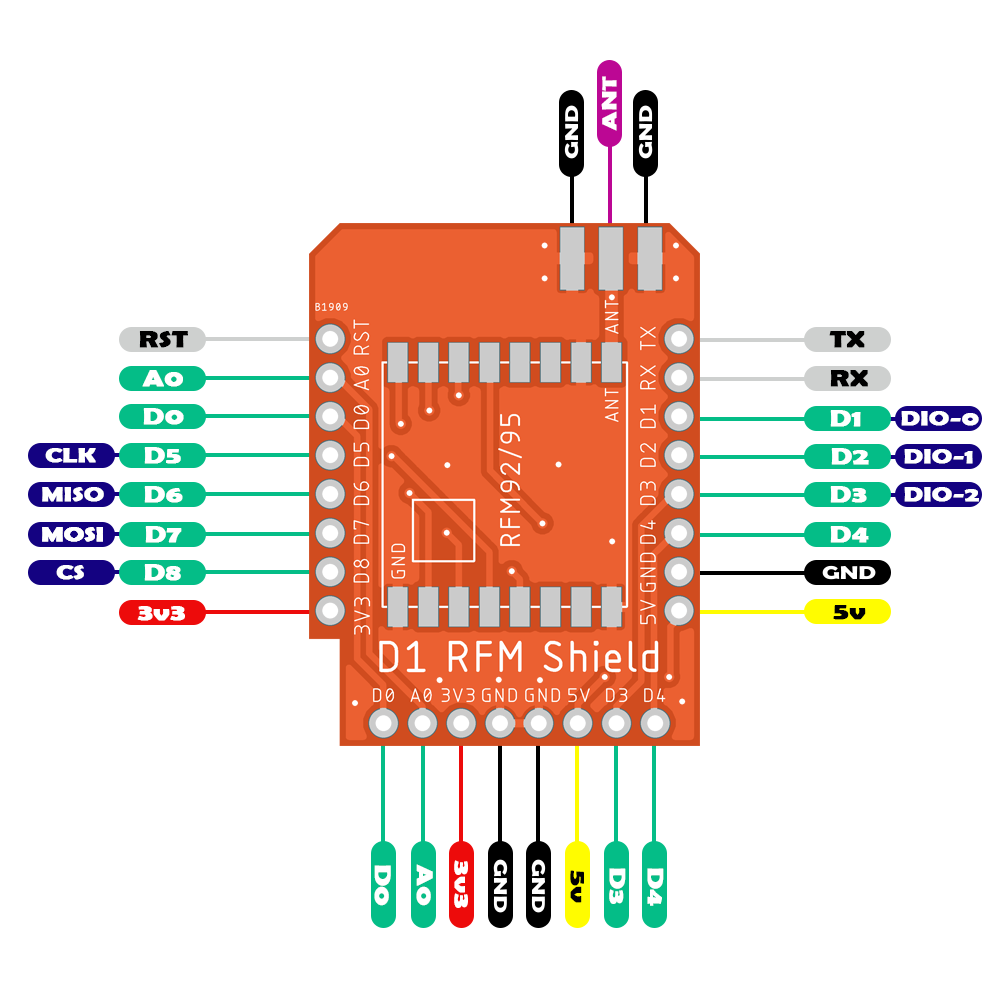
Pin mapping
| RFM95 |
Wemos D1 Mini |
| VCC 3.3V |
VCC 3.3V |
| GND |
GND |
| MISO |
D6 / GPIO12/MISO |
| MOSI |
D7 / GPIO13/MOSI |
| SCK |
D5 / GPIO14/CLK |
| NSS |
D8 / GPIO15/CS |
| DIO0 |
D1 / GPIO5 |
| DIO1 |
D2 / GPIO4 |
| DIO2 |
D3 / GPIO0 (optional) |
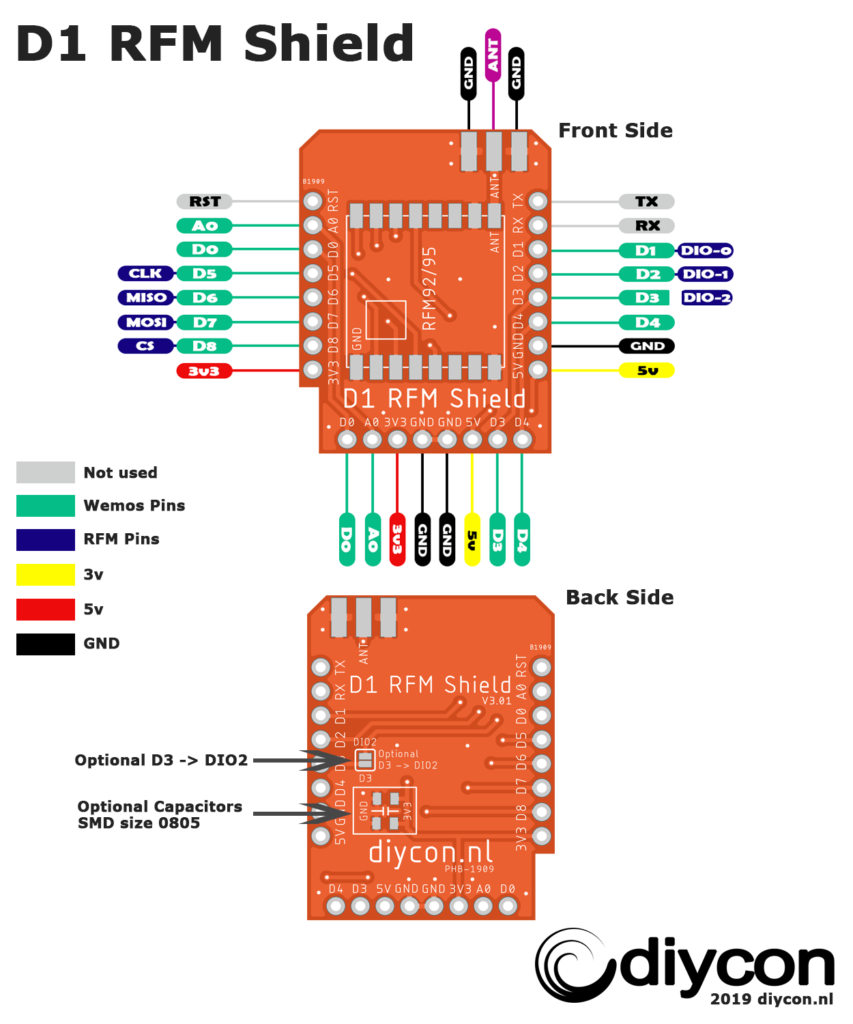
DIO2 can be optionally connected to D3 / GPIO0 with the placement of a jumper. Do this to connect an experimental feature. The RFM95 Frequency Hop connection. in this example we dont use this feature
You can place two optional capacitors the stabalize the VCC voltage. The size is SMD 0805.
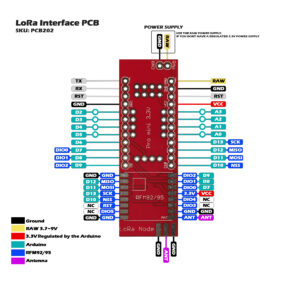
Optional connect a OLED display to pin D3 and D4 we connect our display to the GND, 5v D3-(SCL) and D4-(SDA) pin at the bottom of the shield.
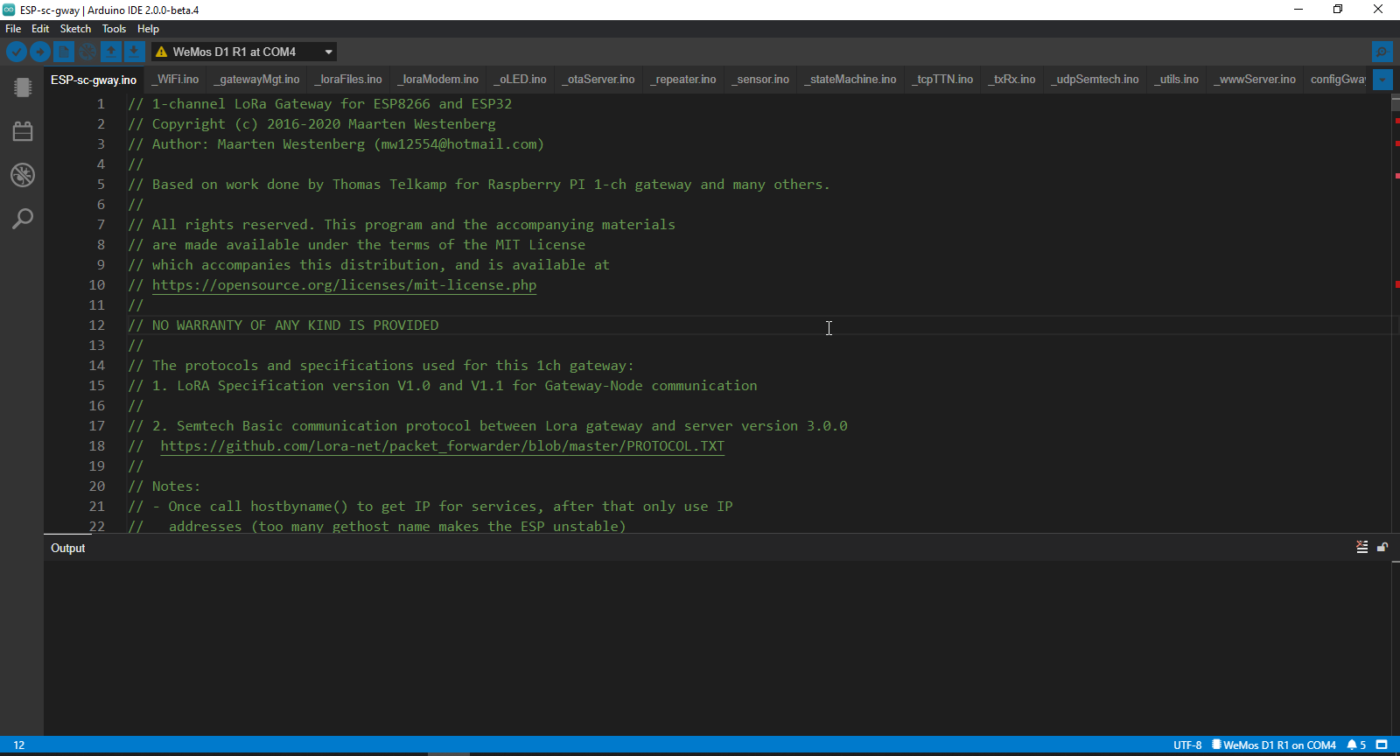
After soldering and connecting the wires to the board we are going to download the ESP-1ch-Gateway sketch.
The lib folder contains al the necessary library for this sketch copy these to your Arduino library folder.
The src folder contains the sketch for the gateway rename the folder to the main ino file ESP-sc-gway else the Arduino IDE can ave some problems with loading the all the files.
In the folder open ESP-sc-gway.ino.
To configure the script open the tab configGway.h
In this tutorial we only going to change the necessary parameters to get the gateway working for the other option please read the compleet readme file on github.
On line 89: Define the frequency band the gateway in our case EU863_870 Europe.
On line 108:: Define the channel you want to use 0 to 8
Line 158 – 170 :Define pin-out configuration this shield is compatible with the COMRESULT configuration select 2
#if !defined _PIN_OUT
# define _PIN_OUT 2
#endif
Optional OLED display when COMRESULT is selected the display pins are D3-(SCL) and D4-(SDA)
Line 349 – Define radio type you can choose between 2 types probably you have the SX1276 RFM95 the sx1272 is used on the RFM92
At the bottom you can define the MQTT definitions.
Configure the server you want to use
#define _TTNSERVER “router.eu.thethings.network”
For the new Things Stack network V3 change to url to # define _TTNSERVER “eu1.cloud.thethings.network”
The only thing we need to do is setup our wifi connection open tab confiNode.h
At line 112 you can define your SSD and wifi password.
wpas wpa[] = {
{ “yourSSID”, “xxxx” },
{ “Your2SSID”, “xxxx” }
};
Line 135 set the Gateway Ident definitions.
Change the location coordinates these coordinates will be used by the TTN network
Upload the sketch!!
After the sketch is uploaded the Wemos will connect to your network
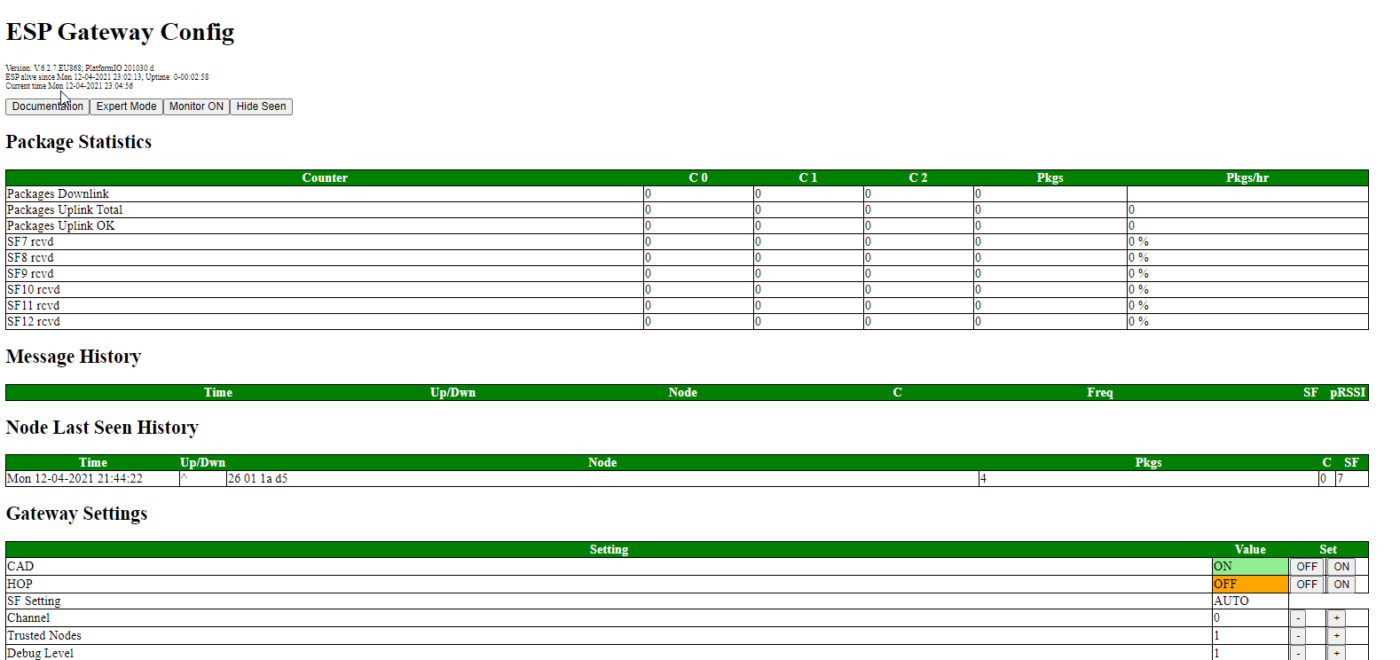
Connect to the gateway with your browser the ip address can be found in the serial monitor.
Click on the Expert mode button and refresh the webpage if everything goes well you are in Expert mode.
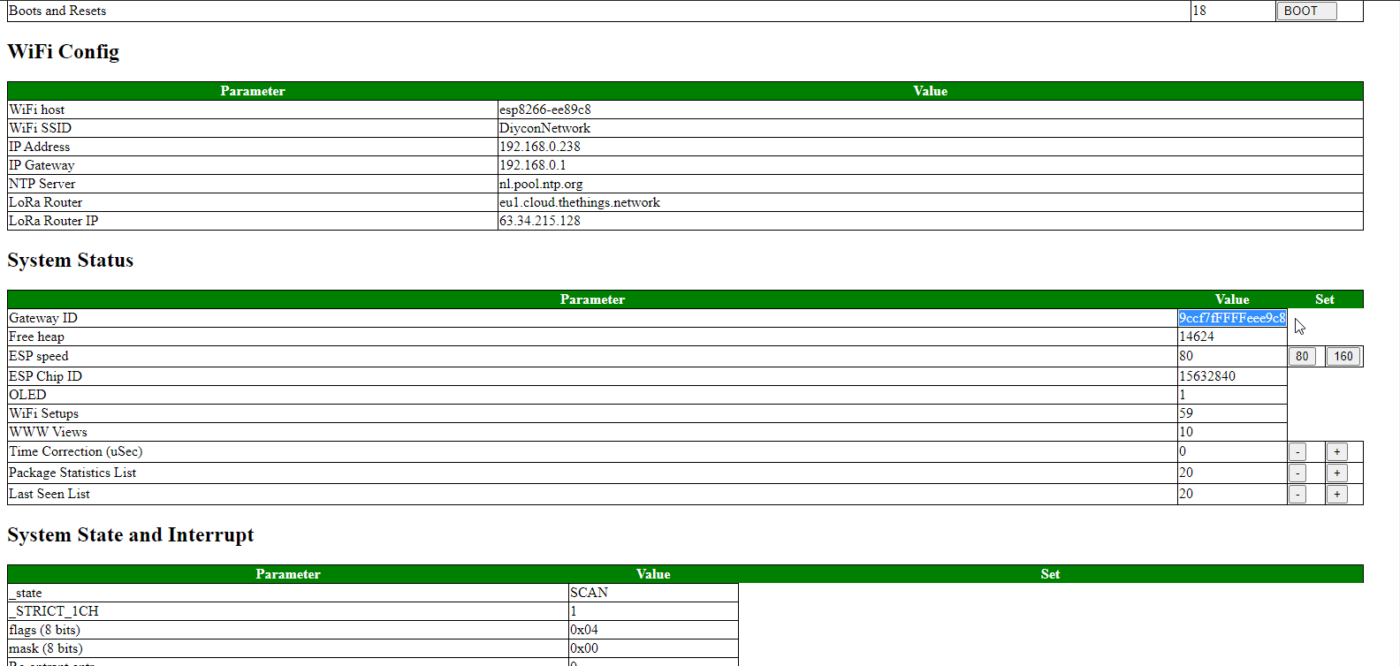
Scroll down till you see the Gateway ID with this ID you can regester your gateway to TheThingsNetwork.
To configure the script open the tab configGway.h In this tutorial we only going to change the necessary parameters to get the gateway working for the other option please read the compleet readme file on github. On line 89: Define the frequency band the gateway in our case EU863_870 Europe. On line 108:: Define the channel […]